ThinPro Upgrade Overhaul - Full Book
This page is a dynamically generated collection of other pages in this book. If you want to focus on one topic at a time, you will see them in the Book Navigation menu to the left (below the Page Navigation tree). Attached files for any given section can be found on the page for that particular section. You will not find them attached here.
Summary
You need ThinPro 7.1 at minimum in order for this process to work as described.
HP Device Manager (HPDM) has a remote reimage task template, but my experience has been that it is riddled with problems. Here are some examples:
- HP will not support reimage operations over wireless networks
- The process sometimes hangs indefinitely
- HPDM agent will abruptly stop talking to HPDM
- HPDM will step on subtasks, causing the entire sequence to fail
- HPDM forces sections of the registry tree back down post-reimage, causing things like wireless network connectivity to break because the registry is looking for network keys and certificates that no longer exist
- There is a Retain HP ThinPro Configuration checkbox that has no impact on whether or not HPDM tries to reconfigure the device post-image
The last two items really illustrate my biggest problem with how HPDM deploys images, and that is that it makes a lot of assumptions that are counterproductive to deploying a clean image.
You can create PXE Deploy Image tasks, but they do not work over wireless networks.
To address the aforementioned shortcomings, we're going to engineer a solution that sidesteps HPDM almost entirely. This solution will take the form of a sort of recovery partition.
First, we'll create a reimage utility to run from the recovery partition. Next, we'll write a script that handles the creation of the recovery partition and installation of the reimage utility. Finally, we'll create some scripts for HPDM to deploy this system.
Creating a Remote Reimage Utility
There are various ways you can go about creating a bootable utility for this purpose, but I'm willing to bet that if you're reading this, you probably have a copy of Ukit handy on a flash drive somewhere. We're going to cheat a little (but only a little) and modify Ukit instead of building something from scratch.
Once we're done modifying Ukit, we'll add in our image and zip everything up into an archive that we can easily deploy.
This process requires a Bash shell. If you don't have Windows Subsystem for Linux installed, you can do this on ThinPro or on another Linux computer.
Preparation
Definitions
Let's get some basic terminology out of the way so we're all on the same page:
- ThinState: ThinPro utility that writes Ukit to a flash drive
- Ukit: HP's Bootable imaging utility. This is an Ubuntu live image with custom scripts packed into a cpio archive
- ThinUpdate: HP's Windows utility for creating Ukit drives, downloading images, etc
- Initial Ramdisk (initrd): Temporary filesystem loaded into memory during boot
- Tarball: An archive created using the tar command
Be aware that the version of Ukit installed by ThinUpdate generally lags behind the version installed by ThinState. This can impact what binaries are available when Ukit boots. For this guide, we'll be using the Ukit version produced by ThinState on ThinPro 7.2.
Prep Work
If you don't have a Ukit drive, please consult HP's documentation on how to use ThinState. A copy of the ThinPro 7.2 Admin Guide is attached to this page for reference.
We have a few prep tasks to run through. First, let's set up a folder structure that we can work in. Name the main folder Remote Reimage Utility and create the following subfolders:
- init\ for working on init.sh
- initrd\ for working on initrd.gz
- tarball\ for storing our finished tar archive
- ukit-final\ for storing completed copies of our modified files
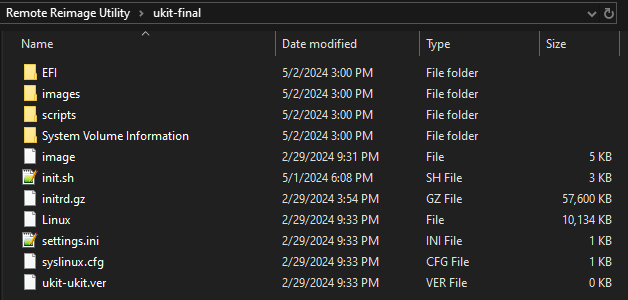
- ukit-source\ for original copies of Ukit files
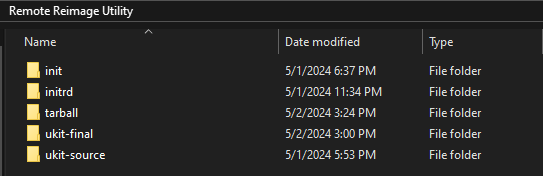
Now copy the contents of your Ukit drive to ukit-source\
File paths for the remainder of this page are relative to the Remote Reimage Utility folder
Modifying Ukit
Initrd
We need to make some changes to the files inside initrd.gz. Copy the file from ukit-source\ to initrd\, then run zcat to decompress it and cpio to extract the files from the archive.
zcat initrd.gz | cpio -idmvWhen you're done extracting files, you'll see the Ubuntu filesystem that Ukit boots to.
The first file we need to modify is init.ukit. Open it up and comment out echo Please remove the USB key and press Enter... and read. This will prevent Ukit from asking for user input before restarting the computer. The commented version of the file is provided below.
#!/bin/bash
# put local startup commands in here

mkdir -p /mnt/usbkey

export USB_DEV=$BOOTDISK
export USBKEY=/mnt/usbkey
# don't pass SYSDISK into ukit, let ukit figure it out
#export flash_device=$SYSDISK

mount $BOOTPART $USBKEY >/dev/null 2>&1

if ! `grep -q usbkey /proc/mounts`; then
	echo "ERROR: Unable to mount USB Key"
	echo "Press Enter to reboot..."
	read
	/bin/bash
	exit 1
fi

clear
cat $USBKEY/init.sh | /usr/bin/tr -d '\r' > /tmp/init.sh
chmod +x /tmp/init.sh
eval /tmp/init.sh

cd /
umount -l /mnt/usbkey
#echo Please remove the USB key and press Enter...
#read
reboot -f
We also need to install a couple extra binaries.
- mkfs.vfat: Formats volumes
- md5sum: Validates file integrity
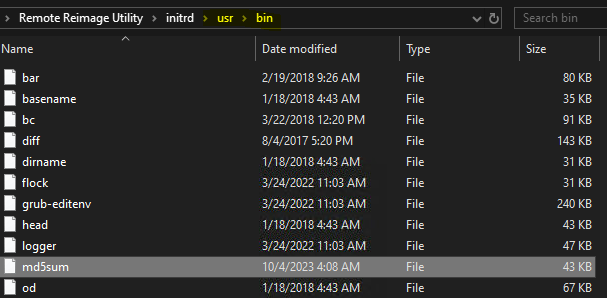
You'll find them on a running ThinPro instance at the locations listed below. Copy them over from ThinPro to the Ukit folder. You don't need to paste them to the exact same paths, but it is good practice to stay consistent with where they are expected to be installed.
- /sbin/mkfs.vfat
- /usr/bin/md5sum
Paste mkfs.vfat to initrd\sbin\
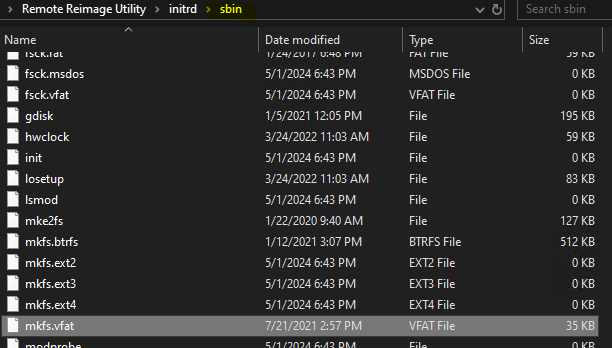
Paste md5sum to initrd\usr\bin\
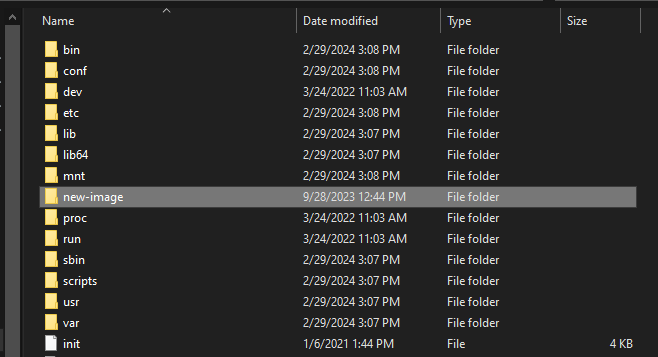
The last thing we need to do is create a new-image folder at initrd\. This is where we'll stash our new image during the reimage operation.
We're all done making changes to initrd.gz, so let's repack and recompress it. We should delete the original initrd.gz file from the folder so it doesn't get packed in with the rest of the files we need.
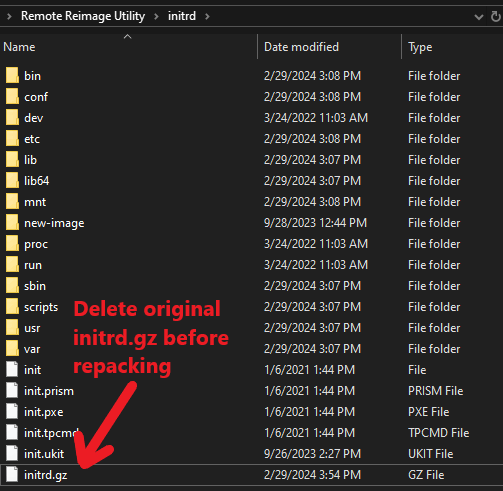
Run this command from within initrd\
find . | cpio -o -H newc | gzip > initrd.gzWhen you're done, copy the new initrd.gz file to ukit-final\.

Init Script
Init.sh runs after Ukit boots. This is what usually displays all the normal options (write image, capture image, etc) you're probably used to seeing. Let's hijack it!
Copy init.sh from ukit-source\ to init\ and replace the entire contents of the copy with the below script. This is how we hook into Ukit and make it do what we want.
If you create a new text file instead of copying the original, you will need to change the end of line (EOL) formatting from Windows to Unix. You can do this with Notepad++
init.sh (click to expand)
#! /bin/bash

## This is a workaround for HP Device Manager limitations regarding reimage over wireless networks
## This script replaces init.sh inside HP's ukit utility and allows the utility to work as a recovery partition (sort of)
## Script assumes the 'please remove media' reboot prompt has been removed from init.ukit inside initrd.gz
## Additional binaries (mkfs.vfat, md5sum) have been installed to initrd.gz
## Author: Newb

#### Define Variables ####
blk_dev=$(lsblk -lf | sort | sed '/boot/d' | grep -i btrfs -B 2 | head -n 1) # <-- System disk
image_path=/mnt/usbkey/images # <-- Location of new image and checksum. This is in the initrd file
image_name=$(ls $image_path | grep dd.gz) # <-- Image to be applied to disk
md5sum=$(ls $image_path | grep md5) # <-- Checksum for new image
image_path_on_ram=/new-image # <-- Where new image will be copied to once ukit boots. This is in the initrd file
ukit_part=$(lsblk -lf | grep -i usbkey | cut -d " " -f 1) # <-- Ukit partition on disk

#### Define Echo Colors ####
red='\033[0;31m'; green='\033[0;32m'; yellow='\033[0;33m'
blue='\033[1;34m'; white='\033[1;37m'
nc='\033[0m' # <-- No color (needs to be added after messages to reset back to white)

#### Define Functions ####
perform_reimage () # Reimage disk
{
	echo -e "${blue}Preparing for reimage${nc}"
	echo -ne "[ INFO ] Copying image to RAM \r"
	cp $image_path/$image_name $image_path_on_ram &&
	echo -e "${green}[	OK	]${nc} Copying image to RAM" ||
	echo -e "${red}[FAILED]${nc} Copying image to RAM"
	cleanup_ukit
	echo -e "${blue}Writing new image to disk. This will take a few minutes${nc}"
	gunzip -c $image_path_on_ram/$image_name | dd of=/dev/$blk_dev status=progress &&
	echo -e "${green}Image operation was successful${nc}"
}

abort_reimage () # Abort reimage operation
{
	echo -e "${red}New image $image_name absent or does not match checksum. Aborting operation${nc}"
	cleanup_ukit
}

cleanup_ukit () # Remove ukit from the disk. It'll leave residual data structures otherwise
{
	echo -ne "[ INFO ] Removing ukit from disk \r"
	umount /dev/$ukit_part &&
	mkfs.vfat -F32 /dev/$ukit_part > /dev/null &&
	echo -e "${green}[	OK	]${nc} Removing ukit from disk" ||
	echo -e "${red}[FAILED]${nc} Removing uikit from disk"
}

reboot_timer () # Displays a countdown timer
{
	for i in {30..1}
	do
		echo -ne "Rebooting in ${yellow}$i${nc} seconds \r"
		sleep 1
	done
	echo -e "Rebooting in 0 seconds"
}

#### Run Script ####
echo -e "${red}Operating system reimage in progress. Rebooting the computer will cause irreversible damage${nc}"
echo -e "Local disk label is ${blue}$blk_dev${nc}"
echo -ne "[ INFO ] Verifying files \r"
cd $image_path
if test -f $image_path/$image_name && md5sum -c --quiet $md5sum
then
	cd /
	echo -e "${green}[	OK	]${nc} Verifying files"
	perform_reimage
else
	cd /
	echo -e "${red}[FAILED]${nc} Verifying files"
	abort_reimage
fi
reboot_timer
As you read through the new script (which you should always do with scripts you find on the internet), you will see that it does these things for us:
- Confirms the integrity of our image using the md5sum binary we installed
- Copies the new image to the new-image/ folder we created
- Deletes Ukit from the disk and formats it using the mkfs.vfat binary we installed
- Writes the new image to the disk using the dd command
While the script executes, it will output information to the user. If the integrity of the new image can not be verified, the utility will exit and the computer will then boot back into the old ThinPro installation as if nothing had happened.
Copy the new init.sh to ukit-final\
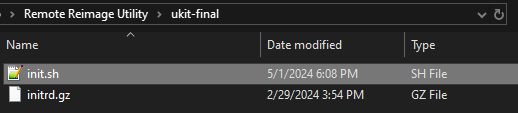
Now copy the remaining files from ukit-source\ to ukit-final\.
Grub.cfg
This last file change isn't really necessary, but it is helpful to have a way to visually identify whether or not the modified utility is booting. Go to ukit-final\EFI\Boot\ and edit grub.cfg. We're just going to replace Loading Ukit with Loading reimage utility.
set default=0
set timeout=0

set menu_color_normal=cyan/blue
set menu_color_highlight=white/blue

search.file /ukit-ukit.ver root

menuentry 'ThinPro UKit' {
        echo    'Loading reimage utility'
        linux   /Linux edd=off ramdisk_size=262144 vga=788 mode=ukit modprobe.blacklist=amdgpu
        initrd  /initrd.gz
}
Adding an Image
This part is pretty straightforward. Boot to an unmodified Ukit drive on a ThinPro computer you want to grab an image from.
You should use a Ukit drive created by ThinUpdate to capture the image. Drives created with ThinState on ThinPro 7.2 will (probably) fail
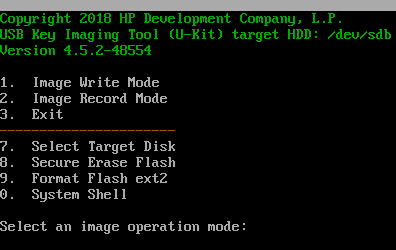
Select Image Record Mode and follow the on-screen instructions. Give the image a descriptive name in line with your naming convention. I'm just going to name mine Dummy. The final filename will be Dummy.dd.gz. When you're done capturing the new image, shut the computer back down and remove the drive.
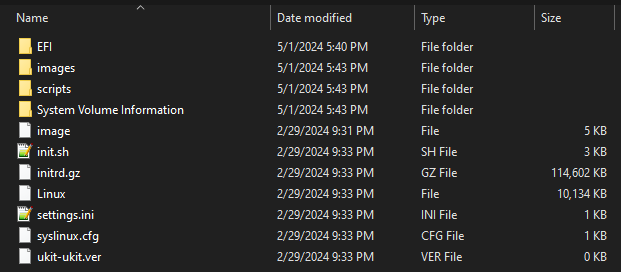
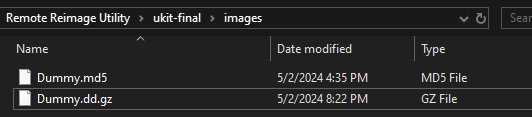
Copy the captured image from the unmodified Ukit drive to ukit-final\images\.

Now we need to calculate a checksum for the image. This allows our new init.sh script to verify the file's integrity before applying it to the target machine(s). You can name the checksum file whatever you want, just make sure it has an .md5 file extension.
md5sum Dummy.dd.gz > Dummy.md5You'll see the checksum file once md5sum is done.
The new init.sh script will not work correctly if you have more than one image and checksum in this folder
Creating the Tarball
At this point, we just need to add everything in ukit-final\ to a tarball for easy transportation. Run the following command from within ukit-final\. This will create a tarbomb, which is not exactly best practice, but it is appropriate for this scenario.
If you want to extract this tarball later, extract it to an empty folder.
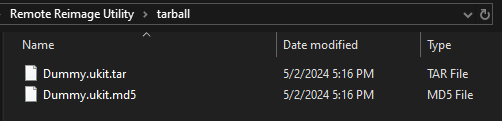
tar cfz Dummy.ukit.tar *Create a checksum for the tarball
md5sum Dummy.ukit.tar > Dummy.ukit.md5Move both files to tarball\.
Installing the Remote Reimage Utility
Now that we have our reimage utility, we need a way to install it on our target computer(s). The solution to this problem boils down to these objectives:
- Shrink the root filesystem
- Shrink the root partition
- Format the extra space for our recovery partition
- Unpack the reimage utility to the recovery partition
- Activate the recovery partition for the next boot cycle and reboot the computer
That sounds like a lot, right? Fortunately, we have a script that will handle all of these objectives.
install-ukit.sh (click to expand)
#! /bin/bash

## This script shrinks the filesystem and OS partition to make room for a recovery partition
## Recovery partition contains a modified copy of HP's thinstate/ukit utility
## The script will automatically add a boot option for ukit and mark it as active for the next boot cycle
## Author: Newb

#### Define Variables ####
blk_dev=$(lsblk -lf | sort | sed '/boot/d' | grep -i btrfs -B 1 | head -n 1) # <-- System disk
reimage_folder=/reimage-files # <-- HPDM will dump upgrade files here
md5sum=$(ls $reimage_folder | grep ukit.md5) # <-- Checksum for ukit.tar
part_two_end="" # <-- Defined in shrink_thinpro function
ukit_part="" # <-- Defined in unmount_and_format_ukit function
boot_order="" # <-- Defined in adjust_boot_order function
new_boot_order="" # <-- Defined in adjust_boot_order function
ukit_bootnum="" # <-- Defined in adjust_boot_order function

#### Define Echo Colors ####
red='\033[0;31m'; green='\033[0;32m'; yellow='\033[0;33m'
blue='\033[1;34m'; white='\033[1;37m'
nc='\033[0m' # <-- No color

#### Define Functions ####
verify_files() # Confirm tarball matches the provided checksum
{
    cd $reimage_folder
    echo -ne "[ INFO ] Verifying files \r"
    if md5sum -c --quiet $md5sum
    then
        echo -e "${green}[    OK    ]${nc} Verifying files"
    else
        echo -e "${red}[FAILED]${nc} Verifying files"
        echo -e "${red}Aborting installation${nc}"
        exit
    fi
}

reset_disk() # Clean up any previous reimage attempts
{
    echo -ne "[ INFO ] Removing previous ukit partition \r"
    parted ---pretend-input-tty /dev/$blk_dev rm 3 yes ignore > /dev/null 2>&1 &&
    echo -e "${green}[    OK    ]${nc} Removing previous ukit partition"    ||
    echo -e "${red}[FAILED]${nc} Removing previous ukit partition"
    echo -ne "[ INFO ] Expanding root partition \r"
    parted ---pretend-input-tty -a optimal /dev/$blk_dev resizepart 2 yes 100% > /dev/null 2>&1 &&
    echo -e "${green}[    OK    ]${nc} Expanding root partition" ||
    echo -e "${red}[FAILED]${nc} Expanding root partition"
    echo -ne "[ INFO ] Expanding root filesystem \r"
    btrfs filesystem resize max /root > /dev/null &&
    echo -e "${green}[    OK    ]${nc} Expanding root filesystem" ||
    echo -e "${red}[FAILED]${nc} Expanding root filesystem"
}

shrink_thinpro() # Make room for recovery partition
{
# It is worth noting that the btrfs filesystem shrink uses GiB while parted is using GB
# This leaves some extra space at the end of the root partition
# The gap at the end does not cause any trouble and the disk is getting completely overwritten anyway
    echo -ne "[ INFO ] Shrinking root filesystem \r"
    btrfs filesystem resize -2G /root >/dev/null &&
    echo -e "${green}[    OK    ]${nc} Shrinking root filesystem" ||
    echo -e "${red}[FAILED]${nc} Shrinking root filesystem"
    echo -ne "[ INFO ] Shrinking root partition \r"
    part_two_end=$(parted /dev/$blk_dev unit GB print | grep -i btrfs | cut -d " " -f 10 | tr -d [:alpha:])
    part_two_end=$(echo "scale=1; $part_two_end - 2" | bc)
    parted ---pretend-input-tty /dev/$blk_dev resizepart 2 yes $part_two_end"GB" yes 2> /dev/null &&
    echo -e "${green}[    OK    ]${nc} Shrinking root partition" ||
    echo -e "${red}[FAILED]${nc} Shrinking root partition"
}

create_ukit_partition() # Create recovery partition where ukit will live
{
    echo -ne "[ INFO ] Creating ukit partition \r"
    parted ---pretend-input-tty -a optimal /dev/$blk_dev mkpart primary $part_two_end"GB" 100% 2> /dev/null &&
    echo -e "${green}[    OK    ]${nc} Creating ukit partition" ||
    echo -e "${red}[FAILED]${nc} Creating ukit partition"
}

unmount_and_format_ukit() # Format partition with FAT32
{
    echo -ne "[ INFO ] Formatting ukit partition \r"
    ukit_part=$(lsblk -l | grep $blk_dev | cut -d " " -f 1 | grep 3)
    umount /dev/$ukit_part 2> /dev/null > /dev/null 2>&1 # <-- Need to unmount before formatting because of residual filesystem structures from any previous attempts
    mkfs.vfat -F32 /dev/$ukit_part > /dev/null &&
    echo -e "${green}[    OK    ]${nc} Formatting ukit partition" ||
    echo -e "${red}[FAILED]${nc} Formatting ukit partition"
}

unpack_ukit() # Unpack ukit.tar to the newly formatted partition
{
    echo -ne "[ INFO ] Mounting ukit partition and unpacking files \r"
    mkdir /tmp/ukit/ 2> /dev/null # <-- Kick error output to null in case the folder already exists
    mount /dev/$ukit_part /tmp/ukit/ &&
    cd /tmp/ukit/
    tar xfz /$reimage_folder/*ukit.tar > /dev/null 2>&1 &&
    echo -e "${green}[    OK    ]${nc} Mounting ukit partition and unpacking files" ||
    echo -e "${red}[FAILED]${nc} Mounting ukit partition and unpacking files"
}

adjust_boot_order() # Adjust EFI boot order for only the next boot cycle
{
    echo -e "${blue}Activating ukit partition for next boot${nc}"
    ukit_bootnum=$(efibootmgr | grep -i ukit)
    if [[ -n $ukit_bootnum ]]
    then
        echo -ne "[ INFO ] Removing previous boot entry \r"
        efibootmgr -B -b $(echo $ukit_bootnum | tr -dC [:digit:]) > /dev/null && # <-- ThinPro 7.2 doesn't like reusing previous boot entries, so we remove it
        echo -e "${green}[    OK    ]${nc} Removing previous boot entry" ||
        echo -e "${red}[FAILED]${nc} Removing previous boot entry"
        echo -ne "[ INFO ] Creating new ukit boot entry \r"
        efibootmgr -c -d /dev/$blk_dev -p 3 -L "ukit" -l "\EFI\BOOT\BOOTX64.EFI" > /dev/null 2>&1 &&
        boot_order=$(efibootmgr | grep -i bootorder | cut -d " " -f 2 | cut -d "," -f 1-50)
        new_boot_order=${boot_order:5:50},${boot_order:0:4}
        efibootmgr -o $new_boot_order > /dev/null 2>&1 &&
        efibootmgr -n 0000 > /dev/null 2>&1 &&
        echo -e "${green}[    OK    ]${nc} Creating new ukit boot entry" ||
        echo -e "${red}[FAILED]${nc} Creating new ukit boot entry"
    else
        echo -ne "[ INFO ] Creating new ukit boot entry \r"
        efibootmgr -c -d /dev/$blk_dev -p 3 -L "ukit" -l "\EFI\BOOT\BOOTX64.EFI" > /dev/null 2>&1 &&
        boot_order=$(efibootmgr | grep -i bootorder | cut -d " " -f 2 | cut -d "," -f 1-50)
        new_boot_order=${boot_order:5:50},${boot_order:0:4}
        efibootmgr -o $new_boot_order > /dev/null 2>&1 &&
        efibootmgr -n 0000 > /dev/null 2>&1 &&
        echo -e "${green}[    OK    ]${nc} Creating new ukit boot entry" ||
        echo -e "${red}[FAILED]${nc} Creating new ukit boot entry"
    fi
}

#### Run Script ####
if [[ $(lsblk -lf | sort | sed '/boot/d' | grep $blk_dev | wc -l) -lt 3 ]]
then
    echo -e "${blue}Installing ukit${nc}"
    verify_files
    shrink_thinpro
    create_ukit_partition
    unmount_and_format_ukit
    unpack_ukit
    adjust_boot_order
else
    echo -e "${blue}Cleaning up previous upgrade attempt${nc}"
    unmount_and_format_ukit
    reset_disk
    echo -e "${blue}Installing ukit${nc}"
    verify_files
    shrink_thinpro
    create_ukit_partition
    unmount_and_format_ukit
    unpack_ukit
    adjust_boot_order
fi
As always, you should read through the script to get a handle on its basic function and flow. There are plenty of comments to help you along your way. There is also a lot of color output to aid with testing and troubleshooting, but you won't really see that from HPDM during deployment.
For the sake of completeness, it is worth discussing why this works, and the reason for that is BTRFS. This is the filesystem that ThinPro uses, and it allows you to shrink a live filesystem that is currently in use! Without that functionality, this process would be much more difficult.
The other big element worth calling out is efibootmgr. This is a command which allows you to manipulate the boot order from a running OS. The best part is that we can temporarily mark a partition as active for the next boot only, so if the reimage utility fails, the computer will be returned to it's normal running state.
This is a very incomplete draft. I should be able to finish this at some point in the next months.
Deploying from HPDM (Draft)
As much as I would love to say that we were completely done with this, we still need a way to deploy our reimage utility and install script. Let's get to it.
Copy Files to HPDM
The easiest way to do this is to copy the tabball, tarball md5 checksum, and installer script to a ThinPro computer. From there, you can use HPDM's capture files task template to upload the three files. I won't cover that process here since it should be well documented in HP's HPDM documentation.
If you run into trouble capturing the files, you can always manually copy them to your HPDM repo. The default location for captured files is \\<your-hpdm-server>\HPDM\Repository\Files\Captured\.
Retrieving Files from HPDM
My experience has been that HPDM doesn't like ....
No comments to display
No comments to display