CCNA Prep: Setting Up Cisco Modeling Labs on Proxmox
Background
Based on the many enthusiastic recommendations from various CCNA prep courses and communities, I purchased Boson NetSim labs for my CCNA studies. However, unlike many a Redditor in r/ccna, I wasn't happy with the Boson labs. You see, NetSim's explanation sections are riddled with errors. These can range from simple typos to long winded explanations that are built around bugs in how the simulator works; Boson just assumes that their simulator is behaving correctly and invents some crazy explanation for why it's right. I took the time to document some of the problems in CCNA Prep: Misinformation in Boson NetSim Labs until it became far too time consuming and I eventually gave up and stopped reading the explanation sections entirely.
So anyway, I was still very determined to get my money's worth out of NetSim, but I also wanted something with real IOS images for sanity checks. I hemmed and hawed on whether I should pay for Cisco Modeling Labs (CML) or use something free like GNS3. Since I'm writing this article, you can probably tell that I ultimately went with CML. The primary factor in my decision was that Cisco IOS images are readily available in CML, so it was the most complete out-of-the-box experience for what I needed at the time.
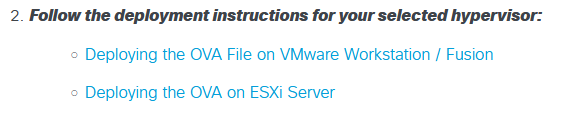
With all of that backstory out of the way, let's get into why this page exists. One of the options for downloading and installing CML is an open virtual appliance (OVA) which is nice because it streamlines deployment a bit. However, Cisco clearly states that they expect you to deploy it on a VMware host.

I thought their installation instructions might have additional information related to other popular types of hypervisors, but that only led to tears and disappointment. They only have VMware Workstation/Fusion (type 2 hypervisor) and ESXi (type 1 hypervisor) listed.
Now, I could run Workstation on my laptop, but it doesn't have enough memory to support the type of labs I want to run. Additionally, even if I wanted to nest ESXi on top of Proxmox, ESXi is no longer free (thanks Broadcom), so the only reasonable option here is to tweak the appliance to play nice with Proxmox.
Setup
Building the Virtual Appliance
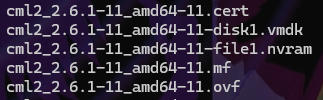
To get started, download the CML OVA file and reference platform (refplat) ISO from Cisco's website, then copy the OVA over to a Proxmox server and unzip it using tar. It is worth noting that tar may not recognize the file as something that it can use, in which case tab completion won't work. This just means you'll have to manually type out (or paste) the filename.
You can confirm the file type is a tar archive with file <cml-ova-filename>. It'll return a value of POSIX tar archive (GNU).
The file isn't compressed, so you don't need to use the z option with tar, just run tar xf <cml-ova-filename> where <cml-ova-filename> is the name of the OVA you downloaded. Once tar is done unpacking the OVA, you'll see all these lovely files shown below. These are used to build the appliance in Proxmox.
Run qm importovf <vmid> <ovf-file> <storage-volume> --format raw to build the VM. Make sure you sub in your own values for <vmid>, <ovf-file>, and <storage-volume>. These are, respectively, the desired ID number for the new VM, the OVF file (duh), and the Proxmox storage volume you intend to use (local, local-lvm, or any other storage you have configured). You can delete the source files when Proxmox finishes building the appliance.
Virtual Appliance Configuration
When Proxmox is done building the VM, you'll see it in the Proxmox GUI. We still need to make some changes before we start it though. A lot of what we'll be doing here is reconfiguring the VM to use VirtIO devices. Fortunately, CML runs on Ubuntu Linux, and Ubuntu comes with VirtIO drivers baked in.
Proxmox has recently added a lot of VMware compatible virtual devices, so you can sub those in for VirtIO devices if you want.
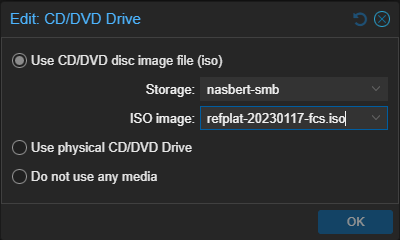
First, add a CD drive and mount the reflplat ISO.
Next, set the CPU type to host to allow the VM to benefit from nested virtualization. CML will probably work without doing this, but each network node you create in a lab is a separate VM, so you should really do it anyway.
For information on how to configure and confirm that the Proxmox host has nested virtualization enabled, check Proxmox's documentation here. It was a little Engrishy the last time I read it, but you can get through it.

Change the BIOS type to OVMF (UEFI).
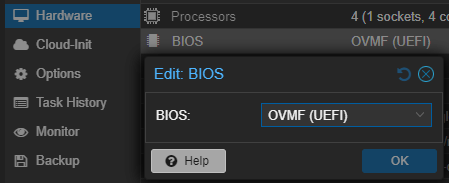
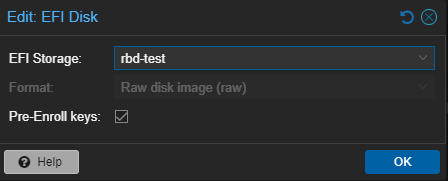
UEFI on Proxmox requires that we add an EFI disk, so we'll do that. Whether or not you pre-enroll keys is up to you.
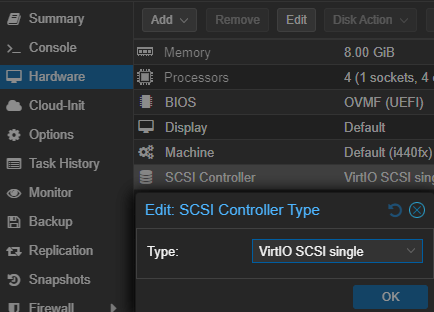
Change the SCSI controller to VirtIO SCSI Single.
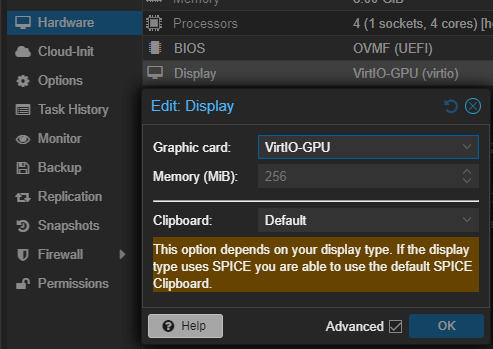
When I set things up the first time, I noticed the display bugged out quite a bit during setup, so I changed the display type to VirtIO-GPU.
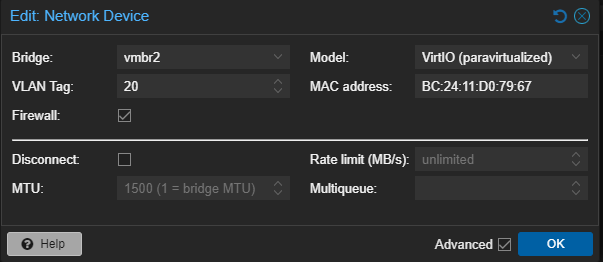
Add a VirtIO NIC to the appliance. If you have your network segmented out, make sure you select an appropriate VLAN.
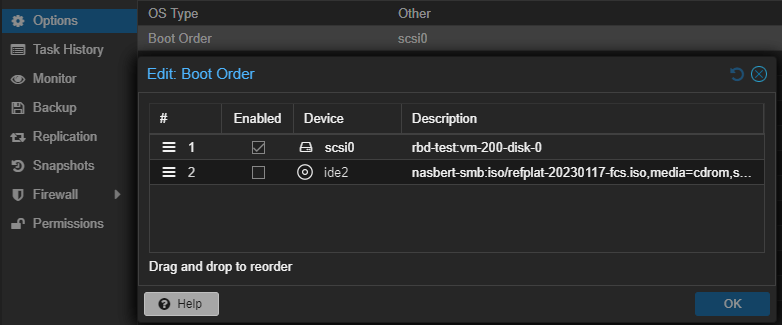
Confirm that the boot order configured in Options is correct. Just make sure scsi0 is at the top since that's the OS drive.
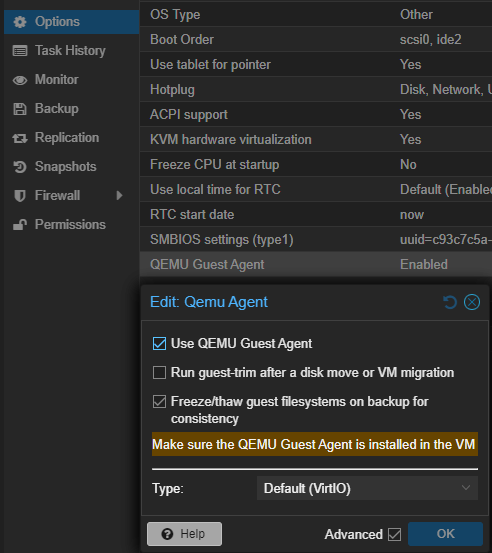
While you're in the Options tab, go ahead and enable the QEMU Guest Agent.
Final Steps
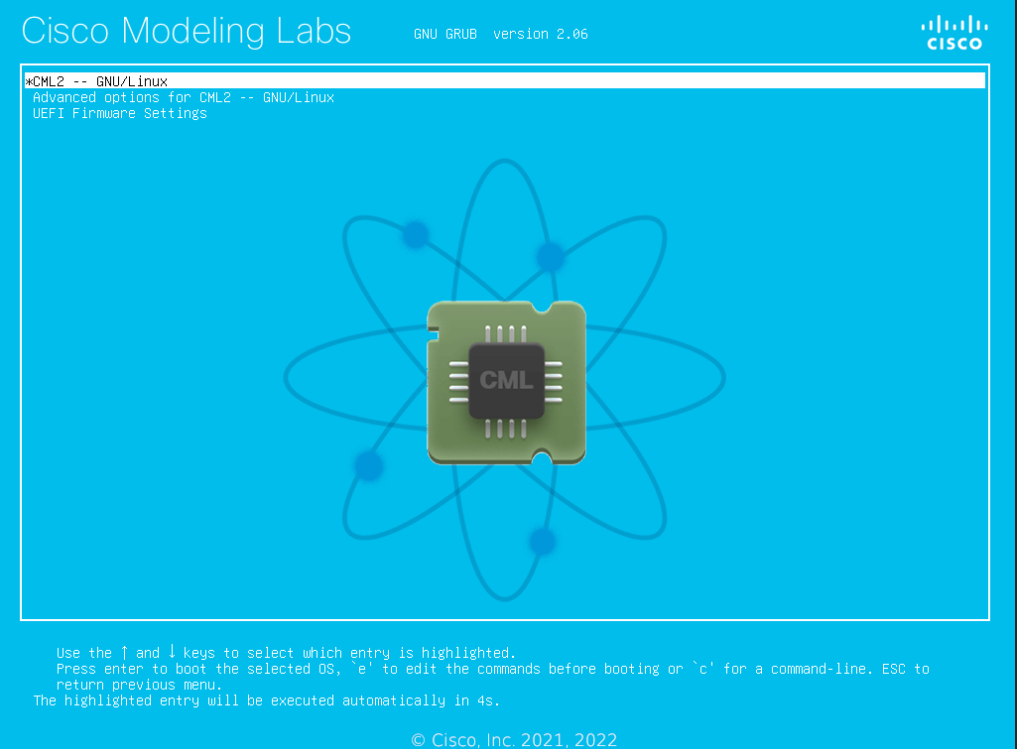
You can start the VM once you're done making all of the above adjustments. You'll know the configuration changes were successful when you see Cisco's custom GRUB screen.
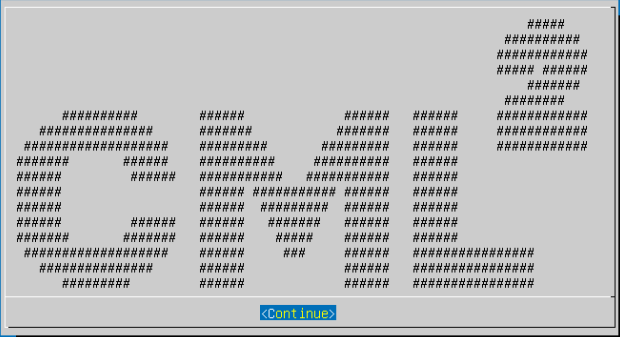
From here, you can follow the setup Wizard which will step you through the installation process.
The installation wizard wasn't able to find the refplat ISO the first time I ran through it. I deleted and re-added the CD drive and that corrected the issue, so try that if you run into the same problem.
When you're done installing CML, you should do a couple more housekeeping things.
- Update the OS
- Install the QEMU guest agent package so that Proxmox can communicate with and manage the VM more effectively
You can perform both tasks from the preinstalled Cockpit web UI at https://<your-ip-or-hostname>:9090/system/terminal. Make sure you replace <your-ip-or-hostname> with an appropriate value.
No comments to display
No comments to display