Hacking on ThinPro: Extension Properties
Summary
This article only applies to extension properties in ThinPro. Managing Windows IoT devices with HPDM is a different animal.
HP Device Manager (HPDM) has the ability to dynamically group devices by different properties. This functionality makes it easy to group devices by hardware model, IP subnet, firmware version, etc. The problem is that the list of properties that you can group by is rather limited. Fortunately, we can add Extension Properties which are variables (named P1 though P6) that each device can set locally and report back to HPDM via the HPDM agent. They are very flexible, and you can assign them any value you like. I'll demonstrate by using two of the six available extension properties to generate a device location/department tree.
This method of setting location and department is based on the hostname and assumes that you have a standard device naming convention which reflects those characteristics.
Here's what we'll do:
- Configure extension properties in HPDM.
- Create a startup rule that sets and reports the two extension properties back to HPDM. We'll use a script to derive the location and department from the computer's hostname.
- Add a device grouping scheme.
- Test the new rule by rebooting devices.
Configuring Extension Properties
You can find the available extension properties by going to the Administration tab and clicking the Configure System button. HPDM comes with location and dept properties preconfigured, but you can easily change them. I'm a little picky about how I set up my environment, so I changed these values to Location and Department respectively.
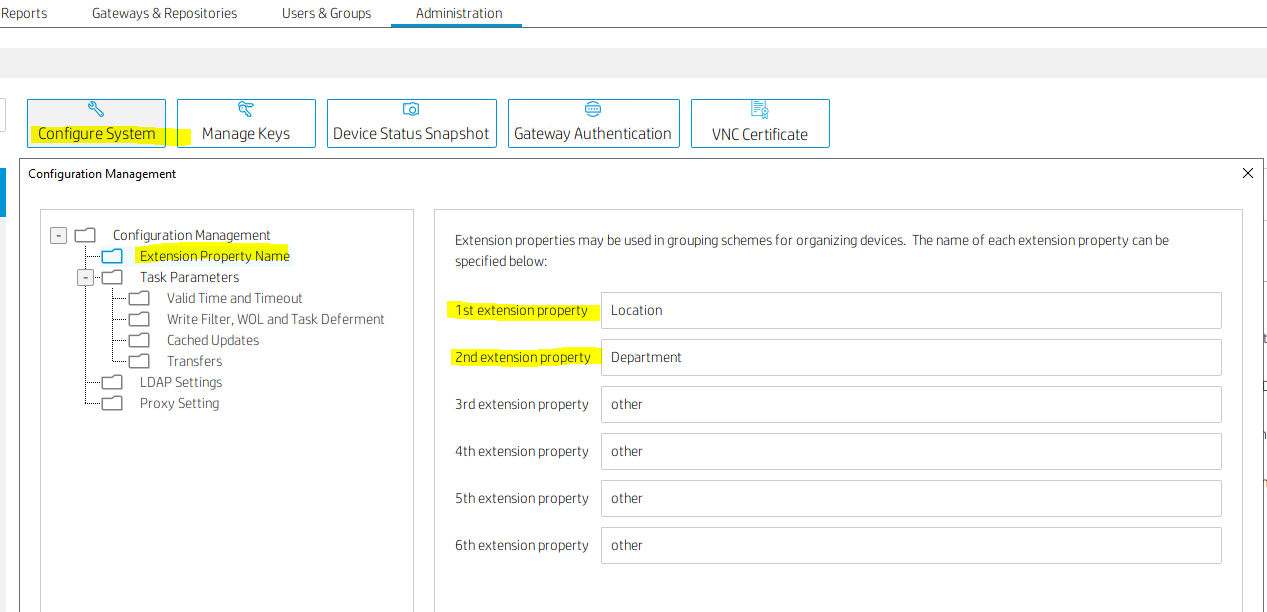
You'll now see the extension properties listed in the Grouping section of the device properties window for any given device.

Creating a Rule
Great. Now what? Well, we can set these properties manually (lame), or we can create a rule that'll automatically set them when the computer boots. To do this, go to the Templates & Rules tab, then click the Add a Rule button.

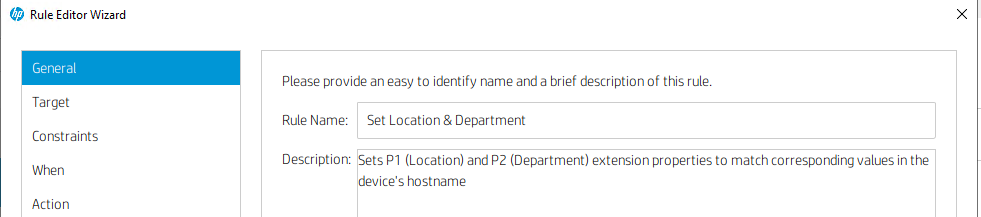
General Info
Give the new rule a name and description.
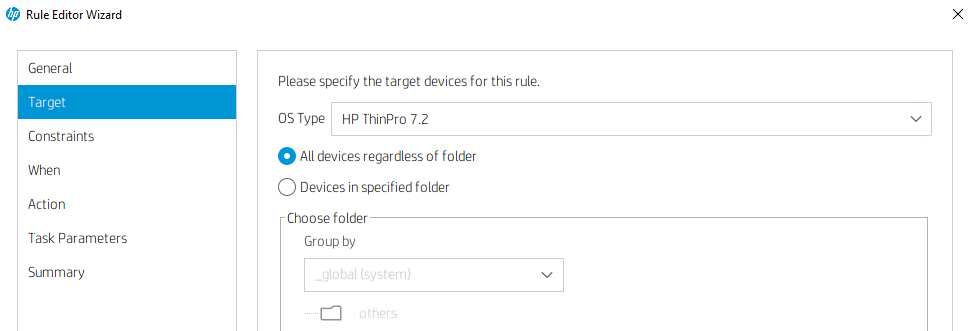
Targets
Select a target. I want this rule to apply to all devices, so I'll just select All devices regardless of folder.
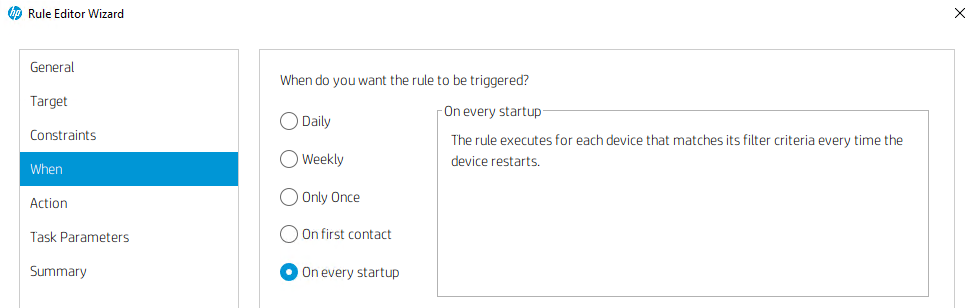
When to Run
Constraints are basically device filters. Again, I'm targeting all devices, so I'll just skip to the When section and choose On Every Startup.
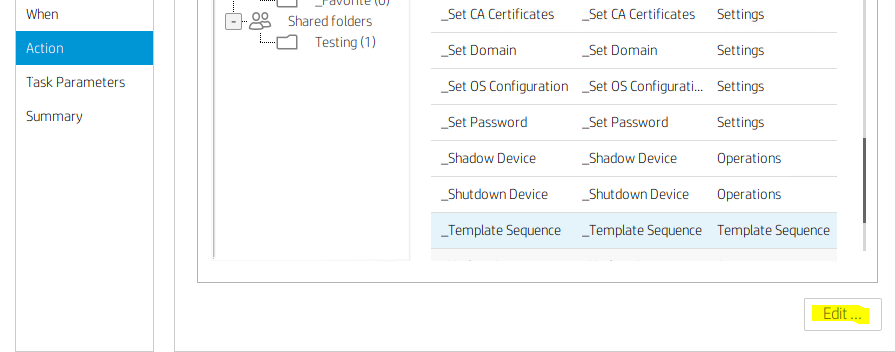
Actions to Perform
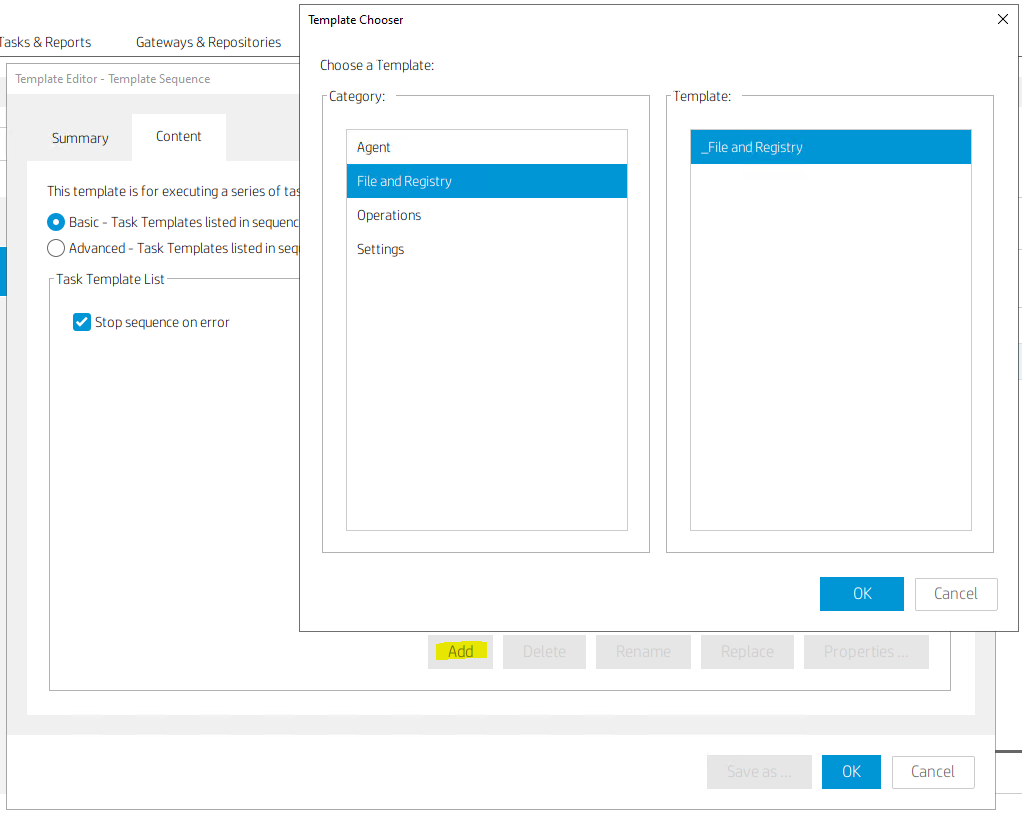
The action we'll perform is a combination of running a script and collecting device information, so we'll select Template Sequence and then click Edit.
Adding the Script
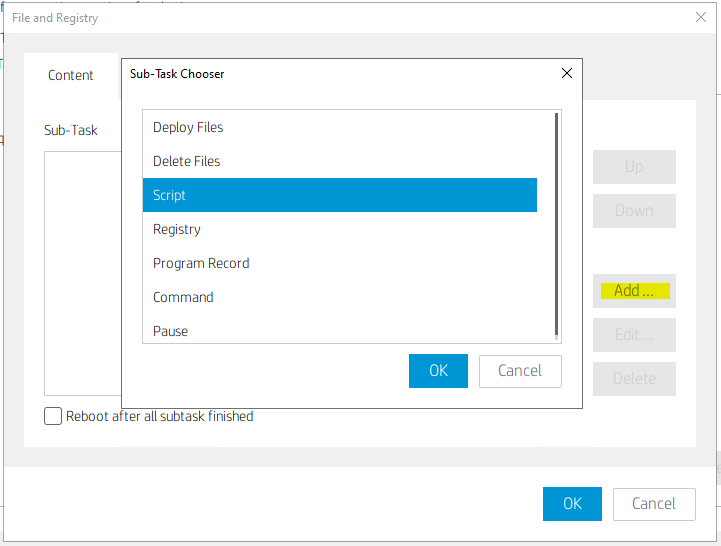
Click Add in the File and Registry window and select Script.
Add the below script to the sub-task editor, then click OK for each window until you're back to the template editor window. In case you're not all that familiar with Bash, what we're doing here is using parameter expansion (specifically substring expansion) to dissect the device's hostname. We use the groupingtoolex command provided by HP to set P1 and P2 properties. The example hostnames that I'm basing this off of use 4 letters for the location and 3 letters for the department (e.g. HomeLab01).
## You will probably need to plug in different values that line up with your naming convention
# Set Location to match the first 4 characters in the hostname
groupingtoolex set P1 ${HOSTNAME:0:4}

# Set Department to match characters 4-6 in the hostname
groupingtoolex set P2 ${HOSTNAME:4:3}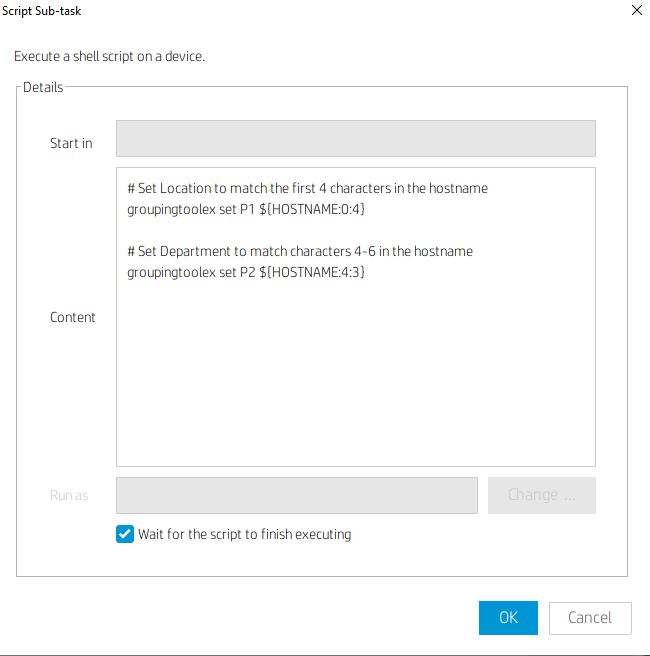
Collecting Asset Information
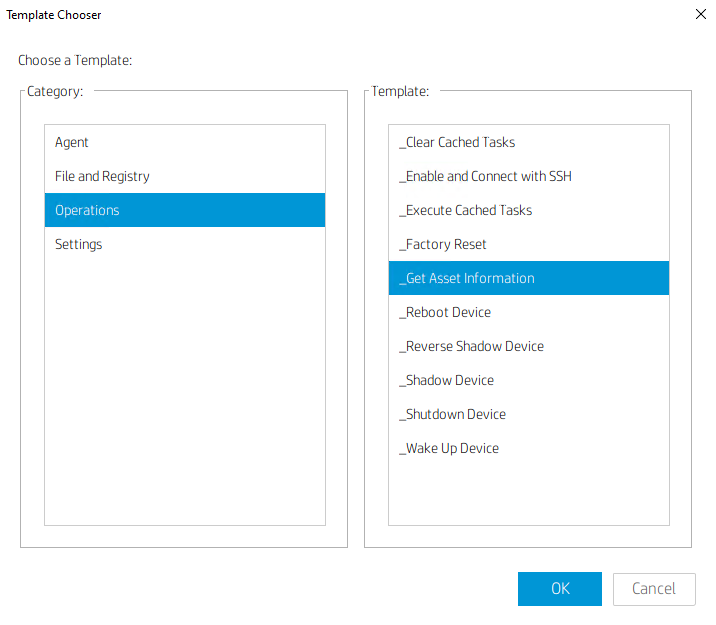
The last thing we need to add to the template sequence is the _Get Asset Information task. Click the Add button again in the template editor window, select the Operations category, then select _Get Asset Information from the available templates. Click OK when you're done.
Wrapping up the Sequence
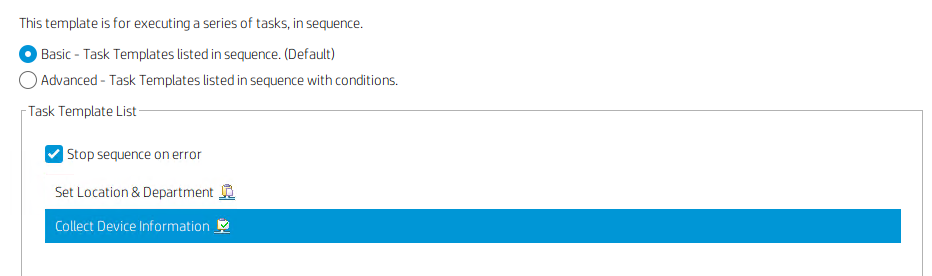
You don't need to do this part, but I like to give sequence tasks friendlier names, so I renamed them to Set Location & Department and Collect Device Information. Click OK when you're done editing the sequence.
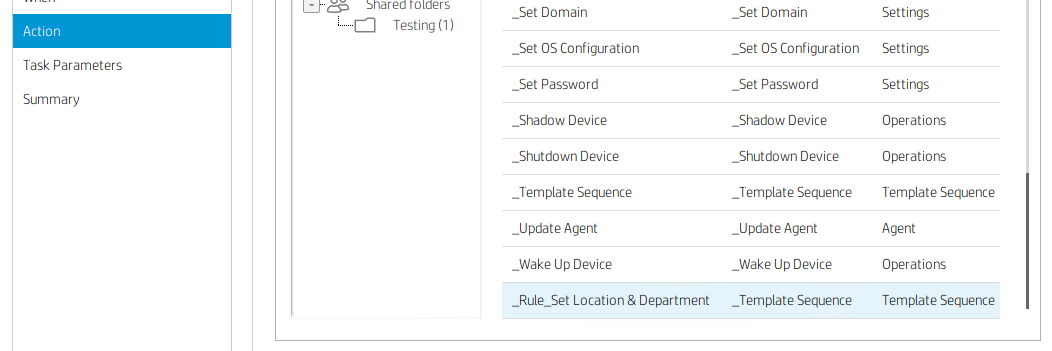
You'll see the new task sequence at the bottom of the template list when you're done. You can set some additional rule parameters like batch size and frequency, but I'm not going to bother. Go ahead to the Summary section and click Finish.
Adding a Grouping Scheme
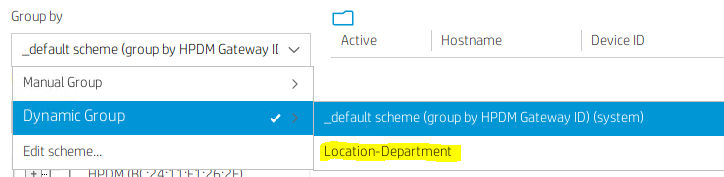
We need to add a scheme that HPDM can use to group devices. Go to the Manage Devices tab and select Edit scheme in the Group by dropdown menu.
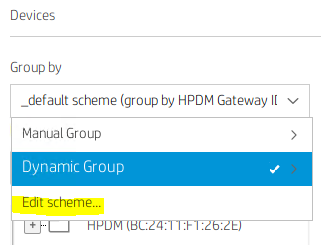
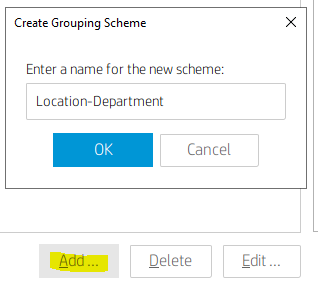
Select the desired properties to group by, then click OK and close the grouping schemes editor window.

You should see the new grouping scheme in the Group by dropdown menu. If you don't, you may need to log out and back in.
Testing
Every time a computer starts up, it'll check in and report the current values for P1 and P2 to HPDM. You can confirm this by going to device properties and checking the Grouping section after a computer reboots.
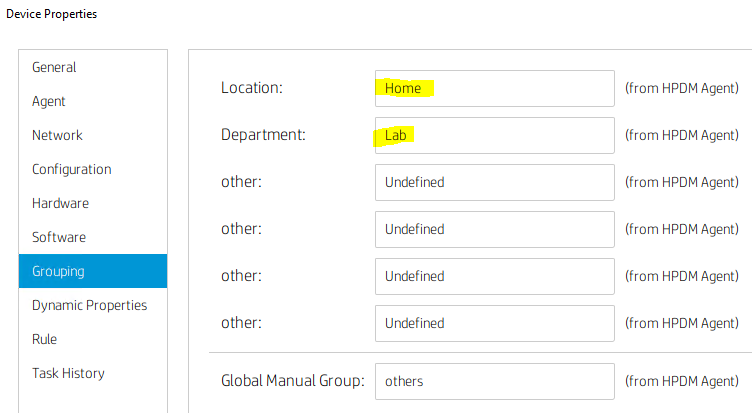
If you don't see any changes, go back to the Templates & Rules tab and confirm that the rule is enabled in Startup Rules.

As you can see from the below image, I have two locations, Home and Work, and two Lab departments, one under each location. The Home-Lab grouping has two computers in it, HomeLab01 and HomeLab02. This is obviously a very small environment. The important thing is that the solution scales well.

Conclusion
Even with this relatively simple example, I hope you can see the value in using HPDM's extension properties feature. The alternative would be to go into device properties and set these groups manually. That is, of course, incredibly prone to human error, especially when you have to work with hundreds or thousands of devices. By automating things, you make your life much easier.
Thanks for reading!
No comments to display
No comments to display